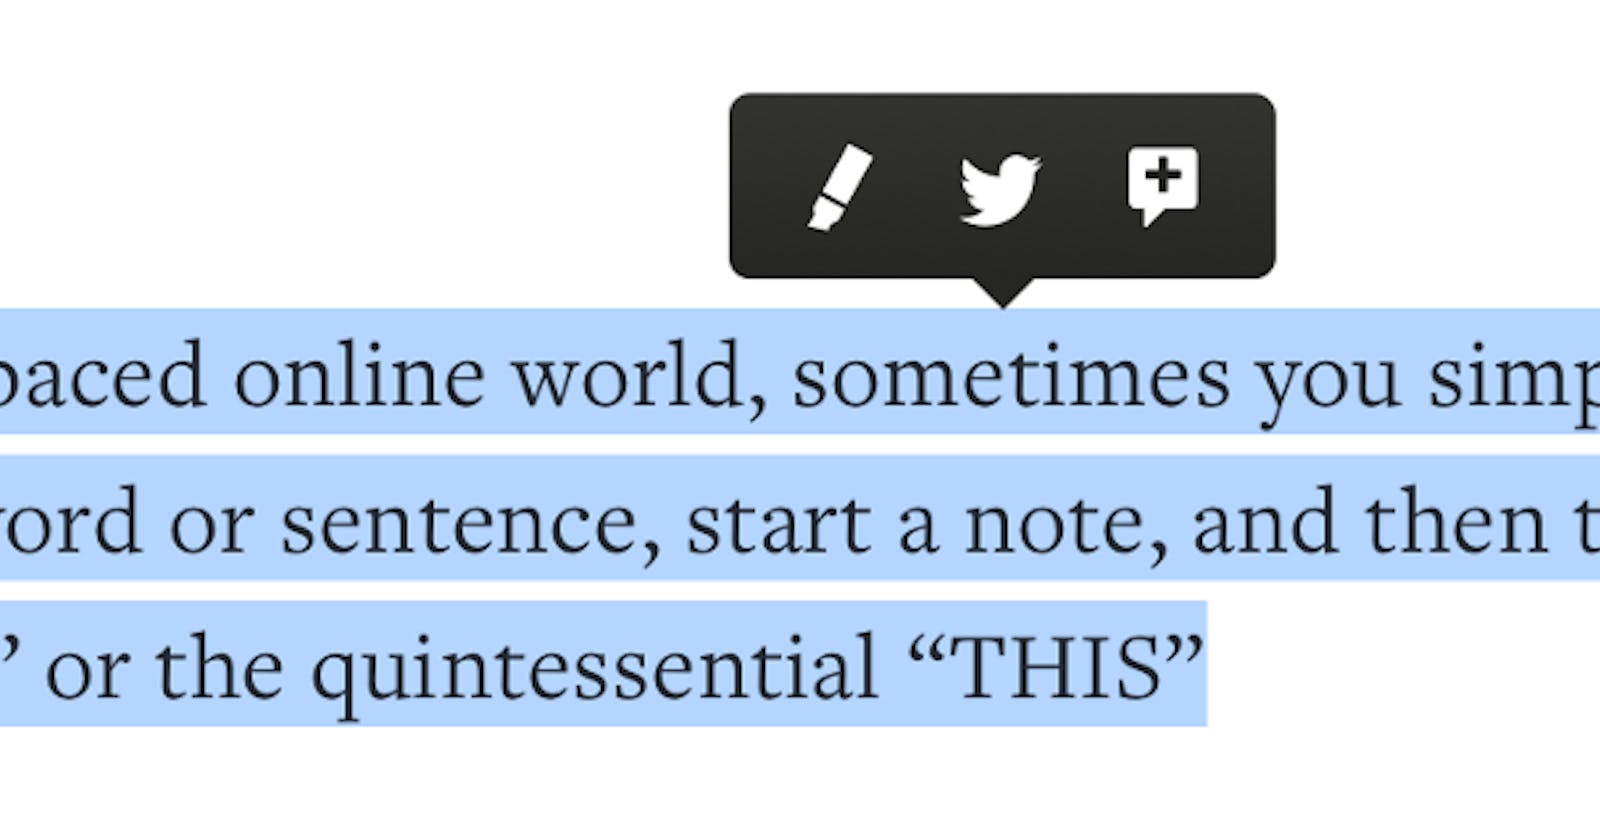
With one simple swipe of the cursor, you can select a word, passage, or paragraph to highlight it.
As you see above, in this article, we'll build the Medium Highlights tool using React Hooks.
PermalinkTable of content
- Pre-requirements
- Initializing your React App
- Folder structure
- Features
- Defining states
- Selecting text
- Final code
PermalinkPre-requirements
| Dependency | Version |
| create-react-app | 4.0.1+ |
| React.js | 17.0.1+ |
| React DOM | 17.0.1+ |
| React Scripts | 4.0.1+ |
PermalinkInitializing your React App
npx create-react-app quoteh
Feel free to give a name to the app
cd quoteh
PermalinkFolder structure
src
├── App.js
├── assets
│   ├── Logo.svg
│   └── Skeleton.svg
├── components
│   ├── quote.css
│   └── quote.js
├── global.css
├── index.js
├── reportWebVitals.js
└── setupTests.js
PermalinkFeatures
Note: This repository will contain the first part of the project available for making the learning process faster and better.
The app will focus on the following features:
- Select text
- Show popup
- Highlight selected quote
- Share
- Create a dynamic image (canvas)
PermalinkDefining states
First of all, I always start thinking about what are the required statement variables. Basically, we have:
- X (horizontal selection: number)
- Y (vertical selection → lines: number)
- Selected text (highlighted words: string)
- Popover (open/hide: boolean)
 // Selection range initial state: number
const [xRange, setXRange] = useState(0);
const [yRange, setYRange] = useState(0);
// Selected text initial state: string
const [selectedText, setSelectedText] = useState('');
// Popover initial state: false
const [showPopover, setShowPopover] = useState(false);
Besides the statement variables, we also need to see that it is necessary to access the selected text (current value). For this, useRef will help.
const selectedTextRef = useRef(null);
PermalinkSelecting text
Now, using getSelection API, you are able to access the range of the selected text. Besides that, it's necessary to convert it to a string (using toString) and remove ( trim) the new lines, tabs, etc.
const selection = window.getSelection();
const selectedText = selection.toString().trim();
We also need to create conditions: If the text was selected, show the popover. Otherwise, hide the popover.
if (!selectedText) {
  // Hide popover when the text is not selected¹
  hidePopover();

  return;
}
Before, to continue the conditions, it's necessary to get the:
- Initial selection range (
getRangeAt(0)) - Start position of a node (
startContainer) - Final position of a node (
endContainer) - Current selected text (
current) - Highlightable region (
querySelector)
const selectionRange = selection.getRangeAt(0);

const startNode = selectionRange.startContainer.parentNode;
const endNode = selectionRange.endContainer.parentNode;

const highlightable = selectedTextRef.current;
const highlightableRegion = highlightable.querySelector('.popover');
If the highlightable region doesn't contain a starting/final node, hide the popover.
if (highlightableRegion) {
  if (
    !highlightableRegion.contains(startNode) ||
    !highlightableRegion.contains(endNode)
  ) {
    // Hide popover when the text is not selected¹
    hidePopover();

    return;
  }
} else if (
  !highlightable.contains(startNode) ||
  !highlightable.contains(endNode)
) {
  // Hide popover when the text is not selected¹
  hidePopover();

  return;
}
We also need to get the size of the element relative to the DOM. If the width is equal to 0, hide the popover.
const { x, y, width } = selectionRange.getBoundingClientRect();
if (!width) {
  // `width` is equal to 0
  // Hide popover when the text is not selected¹
  hidePopover();

  return;
}
To finish, set the value to the respective statement variables:
- Both (x & y) ranges will be relative to the DOM
- The text will be selected (
string) - The popover will be visible (
true)
setXRange(x + width / 10);
setYRange(y + window.scrollY - 34);
setSelectedText(selectedText);
setShowPopover(true);

const { onHighlightPop = () => {} } = props;
onHighlightPop(selectedText);
To capture the event, it's necessary to watch it (addEventListener) and clean after done → side effects (removeEventListener)
useEffect(() => {
  window.addEventListener('mouseup', onSelectText);

  return () => window.removeEventListener('mouseup', onSelectText);
}, [])
PermalinkFinal code

Thank you for reading this article! And if you want to be updated with the best content, subscribe to my newsletter and see you in the next one

